반응형
키넥트를 컴퓨터에 연결해서
자신의 움직임을 3D로 표현해주는 걸 만들었네요
정말 외국인은 대단하네요
우리나라는 아직 이런소식이 없네요

이정도로 표현능력이 대단합니다
좀 후직후직 하지만요
이제 더 깨끗하게 보여주겠죠
저도 프로그램한번 찾아서 키넥트 연결해서 해봐야겠네요
재미있을듯합니다

참 신기하죠
얼마나 더 키넥트가 이용이 될지 모르겠네요~
저도 언능가서 해봐야겠습니다^^
잘되려나...

소스 윈도우용 : http://code.google.com/p/msysgit/downloads/list?can=3
Driver installation
There are two parts to libfreenect -- the low-level libusb-based device driver and libfreenect itself, the library that talks to the driver. You only need to install the driver once.
Windows 7: step-by-step walkthrough (should also work with Windows XP!)
- Plug in your Kinect. Windows will warn that no device driver was found for the plugged device (the LED of Kinect will not turn on). If Windows presents a dialog asking to search for drivers, simply cancel it.
- Open the Device Manager: Start >> Control Panel >> System and Security >> System >> Device Manager
- A device called "Xbox NUI Motor" should be somewhere there (most probably be under "Other devices") with a small yellow warning symbol "!" on top of its icon. Right click on it, and select "Update Driver Software...", then click on "Browse my computer for driver software".
- "Browse" and select the folder where the "XBox_NUI_Motor.inf" is located (/platform/windows/inf inside your libfreenect source folder). Click "Next" and if warned by Windows that a non-certified driver is about to be installed, just order it to install it anyway.
- After that, the Kinect LED should start blinking green. Now there will be two additional devices in the Device Manager list: "Xbox NUI Camera" and "Xbox NUI Audio". Repeat the above instructions for them as well.
You are now ready to configure libfreenect before building...
드라이버 설치후 프로그램
 cmake-2.8.3-win32-x86.exe
반응형
'멋진성이의 지식iN' 카테고리의 다른 글
| 한일전 축구 동영상화면도 저작권 침해? (2) | 2011.01.26 |
|---|---|
| 한국:일본 2011 AFC 아시안컵 4강 경기시간 플레이사진 (0) | 2011.01.25 |
| 써모랩 바다2010 후속 신제품 곧 출시된다. New 스펙살펴보기 (0) | 2011.01.25 |
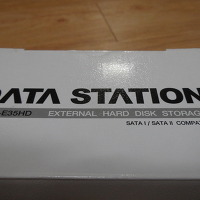
| DATA STATION SATA 외장 케이스 개봉기 (1) | 2011.01.24 |
| 넷큐리 무인감시 CCTV tvn 생초리에서도 나오는군요. (2) | 2011.01.24 |